DIY Neon Sign for 20 $
Neon signs are expensive, it takes long time to be made and often there are problems, because You need extra parts such as transformers, starters etc.
On the other hand, You can make the sign yourself with the design You like, quickly and much cheaper with flexible led neon.
Led neon has very long life and there is no blinking or other problems.
Neon flex is a LED strip enclosed in plastic. It is easily bendable and can be found in different colors. You can buy 220V neon, so You do not need extra transformer. It is generally waterproof, so can be installed outdoors. The light is very bright ( about 120 leds / m) and is very well visible even at full daylight. Led neon is very energy efficient.
What do You need ?
- Draw or print the sign You want, then measure the total length by a thread which You put on the outlines of the sign.
- Buy the desired length of 220 v flexible neon. You will also need power cord, with bridge rectifier, ending caps and neon 2-pin connector.
- Connect the end cap and the power cord with the 2-pin connector. Use glue to hold them firmly to the neon strip. For best waterproofing results, use heat shrinkable tubing around the end cap and the power cord, then heat up with a heat blower, so You get a tight seal.
- As a base for the sign i used Fibran ( insulating material ), which i sprayed black. It is easy to work with, easy to make holes and attach the neon flex.
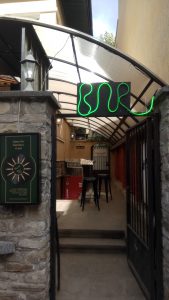
- I attached the neon to the base with cable ties, so that i get the desired sign – in my case BAR.
- That’s all – just plug it in or attach permanently by using electric terminal.
Total cost, including 3 meter green LED neon and power connector with bridge rectifier – 20$